对GD函数库的应用也就是一个贴图的过程,主要用于:验证码、缩略图、水印等场景
一、首先需要创建画布,创建画布又分为创建的是什么类型的画布,例如是纯色的画布,还是图片画布
1.1、纯色画布的创建:
原型:resource imagecreatetruecolor ( int $width , int $height )
解析:imagecreatetruecolor() 返回一个图像标识符,代表了一幅大小为 x_size 和 y_size 的黑色图像。
举例:$img=imagecreatetruecolor(500, 500);
解析:创建了一个500*500的名为img的黑色画布
1.2、图片画布的创建:
原型:resource imagecreatefromjpeg ( string $filename )
备注:后期所有的函数中jpeg、jpg、png、wbmp均可换用,主要是对不同图片格式的解析。
解析:filename为图片画布的图片地址信息。创建的是一个这张图片的画布。
举例:$src=imagecreatefromjpeg('index.jpg');
1.3、颜色的选择:
原型:int imagecolorallocate ( resource $image , int $red , int $green , int $blue )
解析:其中第一个参数表明是在哪个画布中分配的颜色,后面三个参数为RGB颜色代码。作用就是创建一个颜色变量,在接下来的程序中可以运用此变量代表一种颜色。
举例:$color=imagecolorallocate($img, 100, 100, 0);
1.4、画布颜色的填充:
原型:bool imagefill ( resource $image , int $x , int $y , int $color )
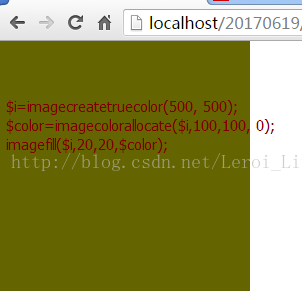
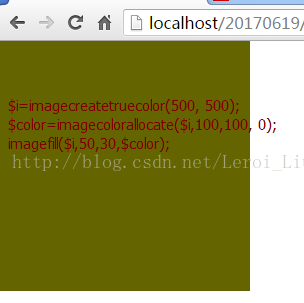
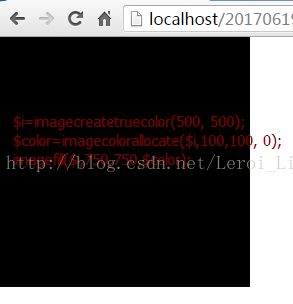
解析:$image为以创建的画布,代表我所要填充的颜色在这个画布当中。$x和$y为颜色填充点。官方给的文档解释为:imagefill() 在 image 图像的坐标 x,y(图像左上角为 0, 0)处用 color 颜色执行区域填充(即与 x, y 点颜色相同且相邻的点都会被填充)。但是,经过效果可以看出,当填充点在画布内时画布颜色会被填充成替换颜色,当填充点在画布外时,画布颜色不会被填充。即只有填充与未填充两种状态。
举例:imagefill($img, 20, 20, $color)——图一;imagefill($img, 499, 499, $color)——图二;imagefill($img, 500, 500, $color)——图三;imagefill($img, 750, 750, $color)——图四;
1.5、几个将字写到画布上的函数:
原型一:bool imagestring ( resource $image , int $font , int $x , int $y , string $s , int $col )
解析:imagestring() 用 col 颜色将字符串 s 画到 image 所代表的图像的 x,y 坐标处(这是字符串左上角坐标,整幅图像的左上角为 0,0)。如果 font 是 1,2,3,4 或 5,则使用内置字体。
原型二:array imagefttext ( resource $image , float $size , float $angle , int $x , int $y , int $color , string $fontfile , string $text )
解析:$image参数表示的是所在画布,$size参数为字体大小,$angle参数代表的是字体倾斜的角度,$x和$y参数为所在位置坐标,$color参数为字体颜色,$fontfile参数为字体文件名,为ttf格式。$text参数为所要输出的字符串等字符。
(备注:将文字写在字符串上还有imagechar等,平时用以上两个函数原型就够用了。
1.6、画点:
原型:bool imagesetpixel ( resource $image , int $x , int $y , int $color )
解析:imagesetpixel() 在 image 图像中用 color 颜色在 x,y 坐标(图像左上角为 0,0)上画一个点。
1.7、画线:
原型:bool imageline ( resource $image , int $x1 , int $y1 , int $x2 , int $y2 , int $color )
解析:imageline() 用 color 颜色在图像 image 中从坐标 x1,y1 到 x2,y2(图像左上角为 0, 0)画一条线段。
1.8、图片文件输出:
原型:bool imagepng ( resource $image [, string $filename ] )
解析:imagepng() 将 GD 图像流(image)以 PNG 格式输出到标准输出(通常为浏览器),或者如果用 filename 给出了文件名则将其输出到该文件。(备注:前面已经说过,这里可以将imagepng用为imagejpeg、imagejpg和imagewbmp)
1.9、取得图片大小
原型:array getimagesize ( string $filename [, array &$imageinfo ] )
解析:官方给出的解释为:getimagesize() 函数将测定任何 GIF,JPG,PNG,SWF,SWC,PSD,TIFF,BMP,IFF,JP2,JPX,JB2,JPC,XBM 或 WBMP 图像文件的大小并返回图像的尺寸以及文件类型和一个可以用于普通 HTML 文件中 IMG 标记中的 height/width 文本字符串。实际使用时可以借鉴以下给出的效果。
举例:
1 | $img = getimagesize("index.jpg"); |
结果:官方对返回结果的解释为:返回一个具有四个单元的数组。索引 0 包含图像宽度的像素值,索引 1 包含图像高度的像素值。索引 2 是图像类型的标记:1 = GIF,2 = JPG,3 = PNG,4 = SWF,5 = PSD,6 = BMP,7 = TIFF(intel byte order),8 = TIFF(motorola byte order),9 = JPC,10 = JP2,11 = JPX,12 = JB2,13 = SWC,14 = IFF,15 = WBMP,16 = XBM
二、应用中的举例:
1、将大图层放在小图层中使用函数:
bool imagecopyresampled ( resource $dst_image , resource $src_image , int $dst_x , int $dst_y , int $src_x , int $src_y , int $dst_w , int $dst_h , int $src_w , int $src_h )
参数解释:dst_image——目标图象连接资源。src_image——源图象连接资源。dst_x——目标 X 坐标点。dst_y——目标 Y 坐标点。src_x——源的 X 坐标点。src_y——源的 Y 坐标点。dst_w——目标宽度。dst_h——目标高度。src_w——源图象的宽度。src_h——源图象的高度。
2、将小图层放入大图层中使用函数:
bool imagecopymerge ( resource $dst_im , resource $src_im , int $dst_x , int $dst_y , int $src_x , int $src_y , int $src_w , int $src_h , int $pct )
解析:将 src_im 图像中坐标从 src_x,src_y 开始,宽度为 src_w,高度为 src_h 的一部分拷贝到 dst_im 图像中坐标为 dst_x 和 dst_y 的位置上。两图像将根据 pct 来决定合并程度,其值范围从 0 到 100。当 pct = 0 时,实际上什么也没做,当为 100 时对于调色板图像本函数和 imagecopy() 完全一样,它对真彩色图像实现了 alpha 透明。$pct设置透明度。
重点理解:::: 比较三个函数:imagefttext— 使用 FreeType 2 字体将文本写入图像、imagecopymerge — 拷贝并合并图像的一部分、imagecopyresampled— 重采样拷贝部分图像并调整大小。 总结:在使用时,imagecopyresampled可用于实现图片缩放效果、imagecopymerge可用于实现水印图片效果、imagefttext可用于实现水印文字效果。 参数比较:
1 | I、array imagefttext ( resource $image , float $size , float $angle , int $x , int $y , int $color , string $fontfile , string $text ) |
三、拓展几个封装函数: 1、获取图片信息:
1 | /* * 得到图片的信息 * |
2. 缩小图片(缩略图)
1 | /* * 缩小图片 |
3. 图片裁剪
1 | function cut($src, $x, $y, $width, $height) |
4. 水印效果
1 | function water($dst, $water, $pos = 8, $tm = 100) |
本文早期发布于个人 CSDN 博客:查看原文
